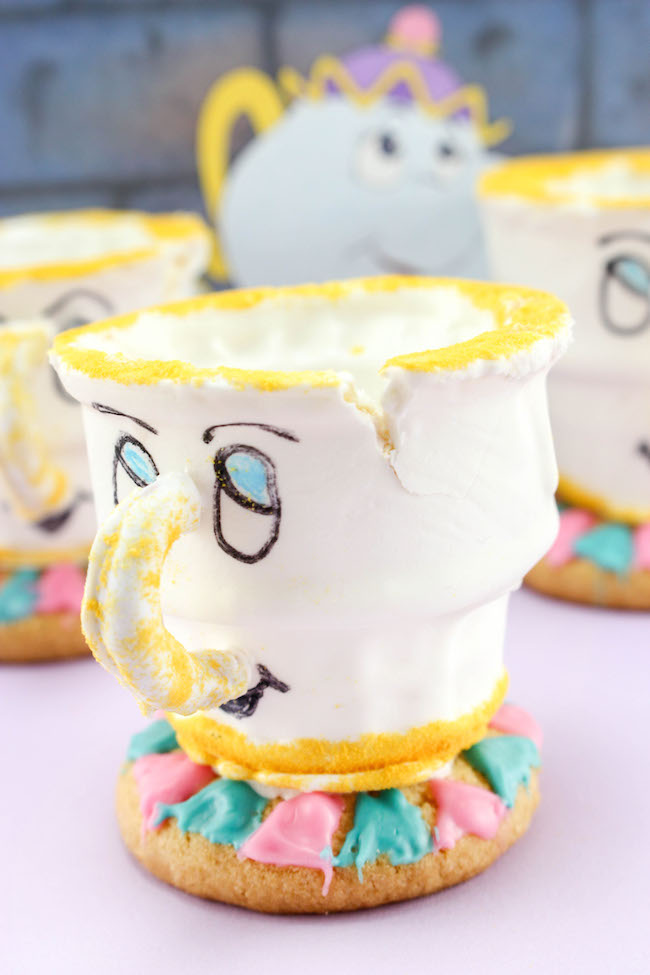
Our Beauty and the Beast teacup cupcakes look harder than they really are to create. Don’t let their adorableness scare you off, I promise if I can do it so can you! This step by step recipe will have you looking like a master baker in no time!
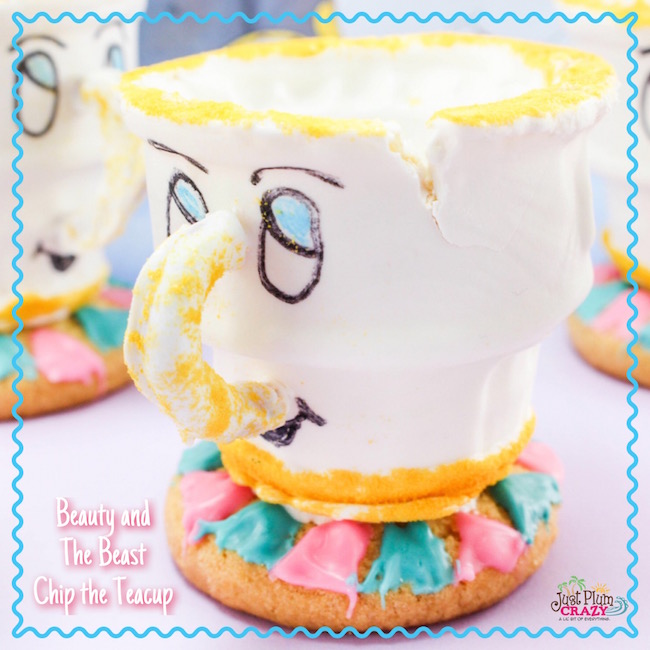
So, lets talk about this adorable cup! You may or may not know that Chip is his name and he was not always a teacup. In Beauty and the Beast, Chip is the son of Mrs. Potts who happens to get turned into a teacup under the spell of the Enchantress. We do not want to give away too much in the off chance you have not seen the movie – but we do find Chip to be incredible charming and a great addition to any little Disney princesses birthday party.

I created this recipe when Beauty and the Beast hit theaters and it has been one of my most popular posts to date, so we hope you find it useful – and fun to make! Definitely bring your favorite little baker in on this one so they can see Chip “turn into” a real edible teapot!
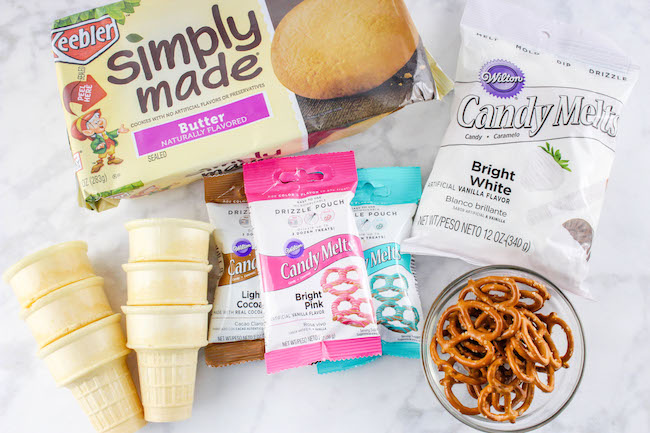
Ingredients
- Keebler Butter Cookies (any brand will work)
- Plain Ice Cream Cones
- Wilton Candy Melts, Bright White
- Twist Pretzels
- Wilton Candy Drizzle Pouch, Pink, Blue, Brown
- Edible Writing Markers, optional
- Edible Gold Glitter
Directions
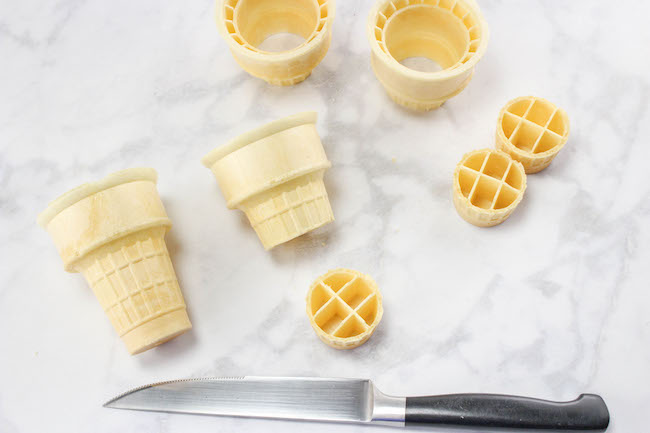
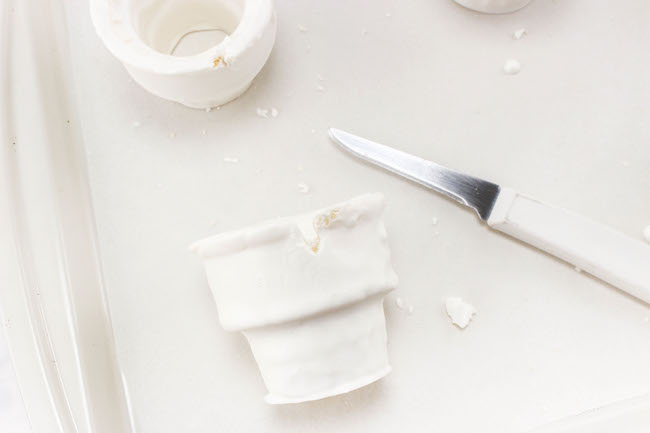
1. Cut about 1/3 of the bottom off each cone.
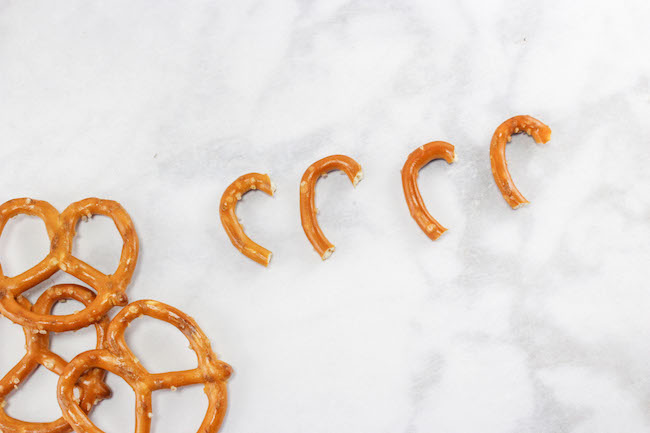
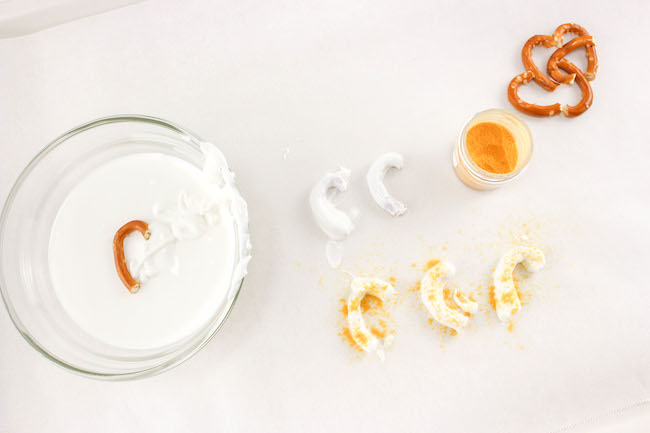
2. Break off rounded edges from the pretzels so they look like little cup handles.
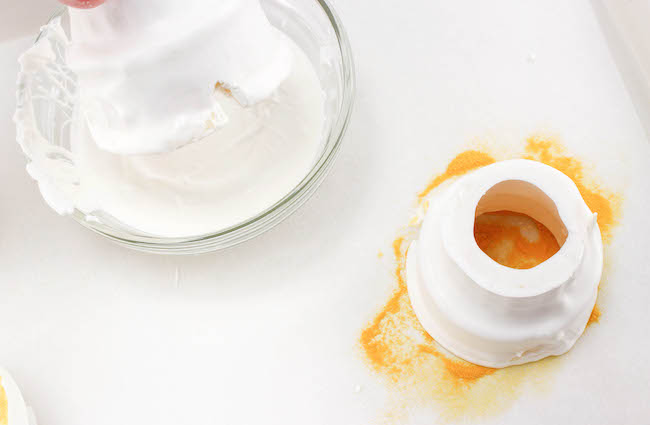
3. Place white candy melts in a bowl, and microwave in 30 second intervals, stirring each time, until melted.
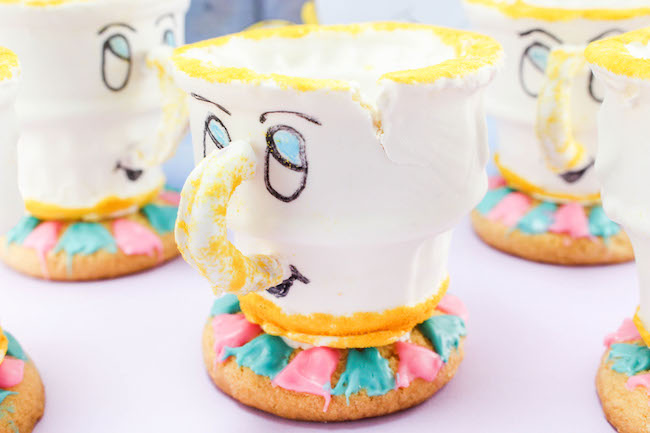
4. Dip the little pretzel handles into melted chocolate until coated and place on parchment paper. Sprinkle on edible gold glitter. Let Dry
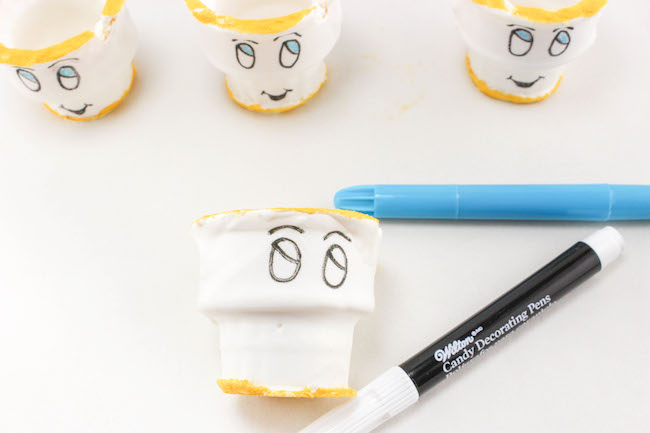
5. Dip ice cream cones into melted chocolate until covered inside and out, place on parchment paper and let dry. Cut a small V-shape into the top of the cone to symbolize the chip.
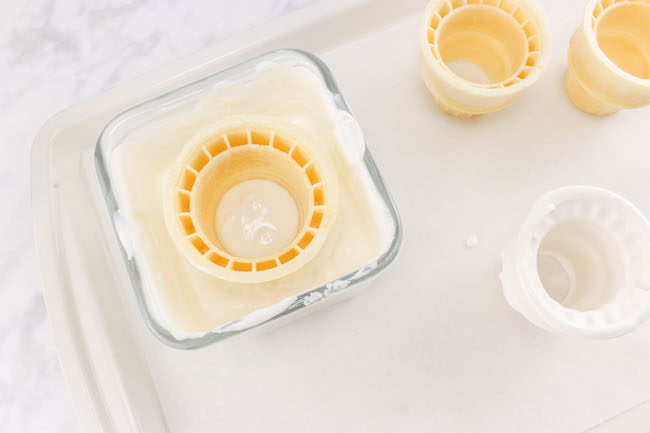
6. Next, dip each end of the cone into the melted candy melts and lightly dip into the glitter to form a gold rim on each end of the cone.
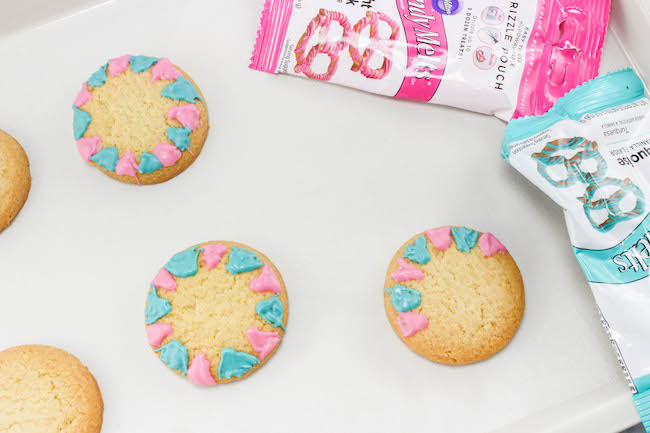
7. Heat the pink and blue drizzle pouches according to package directions, and make little triangle shapes around the edge of the cookie, alternating each color.
8. Next, draw on Chip’s eyes and mouth. You can use an edible food marker or use a brown color drizzle pouch to do this as well, whichever you prefer.
9. Finally, place a small circle of melted chocolate in the center of the cookie and set the cone on it, then put a little more chocolate on the inside of the cone to make sure it sticks to the cookie. Let dry.

10. Enjoy!
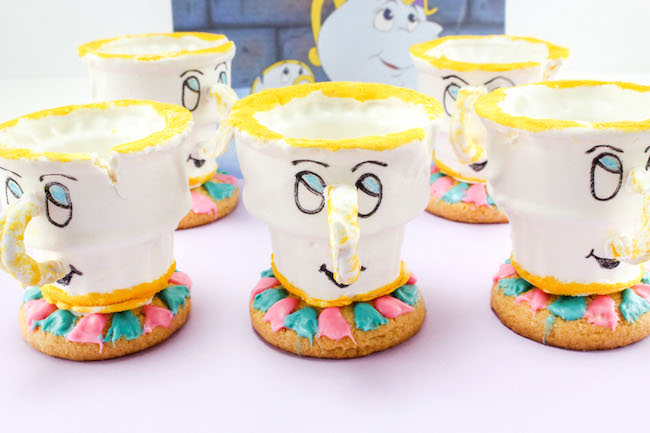

Beauty & The Beast Teacup Cupcake
Adorable teacup cupcakes from beauty & the Beast! Chip will make quite a presence at your little Disney lovers next party!
Ingredients
- Keebler Butter Cookies (any brand will work)
- Plain Ice Cream Cones
- Wilton Candy Melts, Bright White
- Twist Pretzels
- Wilton Candy Drizzle Pouch, Pink, Blue, Brown
- Edible Writing Markers, optional
- Edible Gold Glitter
Instructions
- Cut about 1/3 of the bottom off each cone.
- Break off rounded edges from the pretzels so they look like little cup handles.
- Place white candy melts in a bowl, and microwave in 30 second intervals, stirring each time, until melted.
- Dip the little pretzel handles into melted chocolate until coated and place on parchment paper. Sprinkle on edible gold glitter. Let Dry
- Dip ice cream cones into melted chocolate until covered inside and out, place on parchment paper and let dry. Cut a small V-shape into the top of the cone to symbolize the chip.
- Next, dip each end of the cone into the melted candy melts and lightly dip into the glitter to form a gold rim on each end of the cone.
- Heat the pink and blue drizzle pouches according to package directions, and make little triangle shapes around the edge of the cookie, alternating each color.
- Next, draw on Chip’s eyes and mouth. You can use an edible food marker or use a brown color drizzle pouch to do this as well, whichever you prefer.
- Finally, place a small circle of melted chocolate in the center of the cookie and set the cone on it, then put a little more chocolate on the inside of the cone to make sure it sticks to the cookie. Let dry.
Leave a Reply